Saturday, 20 January 2018

TESTING AND PURITY ANALYSIS FOR CHEMICALS


1.      DETERMINATION OF AVAILABLE CHLORINE IN SODIUM HYPOCHLORITE SOLUTION

Method A:
Pipette 25 ml of the sample and transfer to a 500 ml volumetric flask containing about 300 ml ice cold water. Dilute to the mark with ice cold water and mix well.

Take 25 ml aliquot in a 250 ml conical flask. Add about 50 ml ice cold water and about 2 gm NaHCO3. Titrate with N/10 arseneous acid solution. First test with KI-starch indicator papers when the blue test becomes faint. Add about 1 gm solid KI and starch solution. Titrate further till the blue colour disappears.

ml N / 10 arseneous acid ´ 0.003546 ´ 500 ´ 100
________________________________________ = % available Chlorine (w / v)
                               25 ´ 25
Method B:
Take 10 ml sample in 100 ml standard volumetric flask and make up to the mark with distilled water. Call this solution ‘A’. Take 10 ml solution from ‘A’ in 100 ml conical flask containing about 25 ml distilled water. Add 2-3 gms. KI crystals and 5 ml glacial acetic acid. Quickly stopper the flask, shake well and titrate against N / 10 Na2S2O3 solution using starch solution as indicator till discharge of Blue colour.

Rd ´ N ´ 3.55 ´ 100
________________________________________ = Available Chlorine (gms./ L)
                               0.1 ´ 10 ´ 10

Rd = ml. of N / 10 Na2S2O3
N = Normality of N/ 10 Na2S2O3


2.      DETERMINATION OF Na2O: SiO2 IN SODIUM SILICATE
About 5 gms. of the paste sample is weighed out accurately and transfer to 100 ml volumetric flask with water and make upto the mark with water. Stir well. From this solution, pipette out 10 ml in 250 ml conical flask containing 50 ml water and titrate against 1 N H2SO4using methyl orange indicator. Call this burette reading “M”. Further add sodium fluoride (about 5 gm) and the second titration is made to methyl red end point when liberated sodium hydroxide reacts with the acid. Call this burette reading “P”.

Calculation:

                 “M” ´ Normality ´ 31 
________________________________________ = % Na2O
                    1 ´ Weight of sample

                 “P-M” ´ Normality ´ 60
________________________________________ = % SiO2
                1 ´ 4 ´ Weight of sample


3.      DETERMINATION OF HARDNESS IN WATER

Hardness in water is caused mainly by the presence in solution of various compounds of calcium and magnesium. It is customary and necessary to distinguish between two kinds of hardness:

(a)    Temporary Hardness (sometimes referred to as Carbonate Hardness)
Temporary Hardness results from the presence of bicarbonates of calcium and magnesium, and is so called from the fact that it is for the most part destroyed by boiling.

(b)   Permanent Hardness (Non-carbonate Hardness)
Permanent Hardness is caused by the presence of the sulphates, chlorides and nitrates of calcium and magnesium, and is not destroyed by boiling at atmospheric pressure.

In order to express the hardness of water quantitatively it is usual to calculate the calcium and magnesium compounds present in terms of their equivalent of calcium carbonate (CaCO3). The hardness is then stated in terms of ‘parts CaCO3 per 100,000’.

E.D.T.A. Method:
Special reagents required:
  1. Reagent A – N / 50 E.D.T.A. i.e. Disodium dihydrogen ethylene diammine tetraacetate. Dissolve 3.72 gms of crystalline dihydrate in distilled water and dilute to 1 litre.
  2. Reagent B – Ammonia buffer solution
Add 16.875 gms of Ammonium chloride to 142.5 cc of Ammonium hydroxide solution (sp. gr. 0.880) and dilute to 225 cc with distilled water.
Separately dissolve 0.1540 gms of Magnesium sulphate (MgSO4, 7 H2O) in 12.5 cc distilled water and add 0.2325 gms of solid E.D.T.A. Add this to Ammonium hydroxide / Ammonium chloride mixture and dilute with distilled water to 250 cc.


  1. Reagent C – Total hardness indicator
Add 0.5 gm Solochrome Black GDFA to 100 cc of alcohol (industrial methylated spirit). Warm to dissolve the dyestuff and add 4.5 gms of Hydroxylamine hydrochloride. Allow to stand overnight and filter.
Note: This solution should not be used after one month.

Procedure:

Total Hardness

Transfer 100 cc sample of water to porcelain casserole. Add 2 cc Ammonium Buffer solution (Reagent B) and six drops of indicator (Reagent C). Titrate immediately with E.D.T.A. solution until the solution has lost all traces of red colour. At this point, final colour is usually pure blue but with some water a neutral grey end point is obtained.
Note: When hardness is greater than 250 ppm as CaCO3, use 50 cc or smaller sample.

            Tire reading ´ 1000
        ____________________ = Total Hardness (ppm as CaCO3)      
             Sample taken in ml.

[Note: 1o German hardness = 18 ppm]


4.      DETERMINATION OF PURITY OF SODIUM CARBONATE (SODA ASH)

Accurately weigh 5.50 gms. of the sample. Transfer to a 500 ml conical flask with 100 ml distilled water and dissolve completely by shaking. Observe for the presence of turbidity. Add 5 to 6 drops of indicator methyl orange solution and titrate with a standard N / 1 Sulphuric acid solution till the yellow colour changes to orange red.

Calculation:

ml of N / 1 Sulphuric acid ´ 0.053 ´ 100
________________________________________ = % Na2CO3 alkalinity
                               5.3


5.      ANALYSIS OF CAUSTIC SODA FLAKES:

Strength as NaOH and Carbonate as Na2CO3


Weigh out accurately from a stoppered weighing bottle 18-20 gms. of the material into a 500 ml beaker. Add 250 ml cold carbon dioxide free water. Stir until dissolved, cool, transfer into a 500 ml measuring flask, dilute to the mark at room temperature with carbon dioxide free water and mix well. Call this solution ‘A’.
Transfer 50 ml solution ‘A’ to a 250 ml conical flask, dilute to 150 ml with water and titrate with N / 1 Hydrochloric acid using phenolphthalein as indicator, till the pink colour disappears. Take this reading as P ml. Then add 0.5 ml bromophenol blue solution and further titrate with N/1 Hydrochloric acid until the blue colour changes to greenish blue. Take this reading as M ml.

Calculation:


                           M – 2(M – P) ´ 40
________________________________________ = % Strength as NaOH
                               Weight taken


       2(M – P) ´ 53
________________________________________ = % Carbonate as Na2CO3
                               Weight taken


6.      ANALYSIS OF SODIUM HYDROSULPHITE (SODIUM DITHIONITE) (HYDROS)

Remove the top layer of the sample and weigh accurately in a tared weighing bottle 8.0 – 8.5 gms. of the material remaining in the sample bottle without mixing. Place 40 ml 40% formaldehyde solution and 910 ml boiled-out and cooled water in a 1 litre volumetric flask with a short neck (about 1 inch above the graduation mark), mix well, give the liquid in the flask a swirling motion, and pour in the weighed sample through a short stemmed funnel. Wash the funnel and weighing bottle rapidly with boiled-out and cooled water, dilute to the mark, and mix well. The swirling motion given to the liquid prevents the dithionite from forming a cake at the bottom of the flask. Allow the solution to stand for at least 15 minutes so that the reaction between the dithionite and formaldehyde may be complete. Call this solution A.

Place about 100 ml boiled-out and cooled water in a 500 ml conical flask, and add 25 ml Solution A by means of a pipette. Add 5 ml glacial acetic acid and 50 ml N/10 iodine, allow to stand for 2 minutes, and titrate the excess of iodine with N/10 sodium thiosulphate, slowly towards the end-point, using freshly prepared starch solution as indicator added towards the end of the titration.

Carry out a control test using 25 ml boiled-out and cooled water instead of 25 ml Solution A.

Calculation:
Let, A = ml N/10 Na2S2O3 required in control test
and B =  ml N/10 Na2S2O3 required in test


                              (A-B) ´ 17.41
                     ____________________ = Strength calculated as % Sodium Hydrosulphite
                               Weight taken                                                        (M.W. 174.1)


7.      ANALYSIS OF GLAUBER’S SALT (SODIUM SULPHATE)

Take 1 gm of the sample and dilute it with 100 ml distilled water in volumetric flask. Take 50 ml Acetone in conical flask and add 10 ml of the above solution along with 2 ml Di-thiozone indicator and add 1 to 2 drops of Nitric acid till colour changes. Add 2 ml Buffer solution and titrate with 0.01 M Pb(NO3)2 till colour changes from blue-green to brick red.

Calculation:

            Burette reading´ 0.142 ´ 100
            ___________________________ = % Na2SO4
                     Weight taken ´ 10                                                      

Note:

Di-Thiazone indicator –
0.05 gms indicator + 100 ml Acetone

Buffer solution –
Take 200 ml. water. Add 46 ml of Dichloro acetic acid, followed by 40 ml 10 N NH3 & adjust pH 7.0. Add 22 ml of Dichloro acetic acid and adjust pH 1.5 – 2.0. Make total volume of 500 ml.

0.01  M Pb(NO3)2 –
Dissolve 16.560 gms. of Pb(NO3)2 in 500 ml distilled water. Take 50 ml of this solution and dilute to make 500 ml with distilled water.


8.      DETERMINATION OF PURITY OF SODIUM CHLORIDE (COMMON SALT)

Dissolve 5.845 gms of the sample in water and make upto 1000 ml volume in a volumetric flask. Mix well.

Pipette 50 ml aliquot of the above solution into a 500 ml Erlenneyer flask, add 4 drops of 10% w/v K2CrOindicator solution and about 0.5 gm of c.p. CaCO3. Titrate against a standard N/10 silver nitrate solution until the orange pink tint due to Ag2CrO4 precipitate is produced. This indicates the end point.

Calculation:
ml of N / 10 AgNO3 required ´ 0.005845 ´ 1000 ´ 100
_______________________________________ = ml of N / 10 AgNO3 required ´ 2 = % NaCl.

                               50 ´ 5.845 


9.      DETERMINATION OF PURITY HYDROGEN PEROXIDE


Weigh 2 gms of sample in glass stopper bottle & dilute it up to 250 ml with volumetric flask. Pipette out 10 ml of this solution, add 50 ml of water & 20 ml of 10% sulphuric acid & titrate against 0.1 KMNO4 to the appearance of faint pink colour.
.

Calculation:


            Burette reading´ 42.52 ´ Normality of KMNO4
            ___________________________                  = % Purity
                       Weight taken


10 Volume = 3% of H2O2

Sunday, 6 September 2015

How to Calculate Fabric GSM Using GSM Cutter

The meaning of GSM is “gram per square meter”, which unit is (gm/m2).

GSM Cutter:

GSM cutter is a circular cutter. GSM cutter cuts 1/100 of a square meter of fabric area.

GSM Calculation Method Using GSM Cutter:

GSM calculation method using GSM cutter is not same as we have followed during GSM calculation method without using GSM cutter. Here, we should follow the below steps:
  1. Firstly, you have to cut 5pcs swatches by sing GSM cutter from the different parts of fabric.
  2. Now, Measure the weight of each cutting swatches with the help of weighing balance in one by one method.
  3. Calculate the average weight of cutting swatches.
  4. Now, by multiplying “average cutting swatch weight” with 100, we can easily get the actual fabric GSM.
Note: Area of round GSM cutter is (1/100) m2
Now, one example is enough to clear the above discussion which has given in the following.

Example:

Suppose,
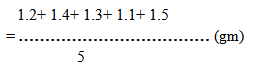
5 pcs cutting swatches weights are 1.2gm, 1.4gm, 1.3gm, 1.1gm and 1.5gm respectively.
Now,
Average weight of cutting swatch,

= 1.3gm per SQ.Meter 
In this situation, we have to multiply average cutting swatch weight by 100 to get actual fabric GSM.
So,
Fabric GSM = Average cutting swatch weight × 100
= 1.3 × 100
= 130
So, fabric GSM by using GSM cutter is 130

Saturday, 4 July 2015

Sewing Faults

Sewing faults are the most common ones found during a product inspection for garments. Sewing defect are the major problems in quality section. The product quality is more affected by sewing defects.

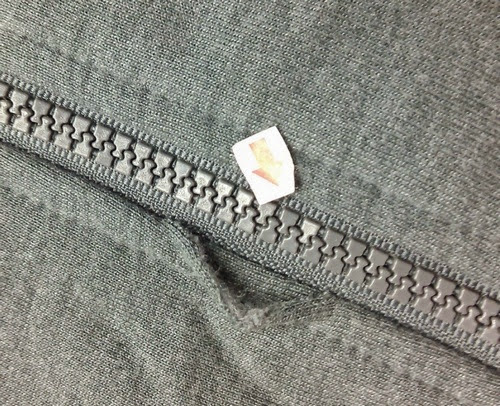
The following sewing faults are found in quality section.

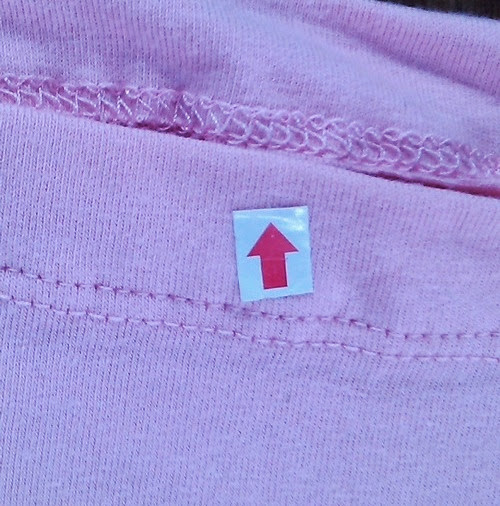
  1. Missing Stitch
  2. Skip stitch
  3. Lycra missing
  4. Bottom up down
  5. Oil spot
  6. Pen spot
  7. Over stitch
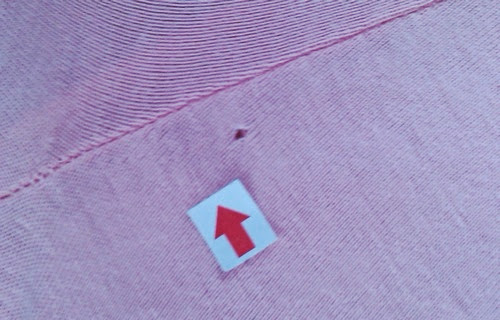
  8. Hole

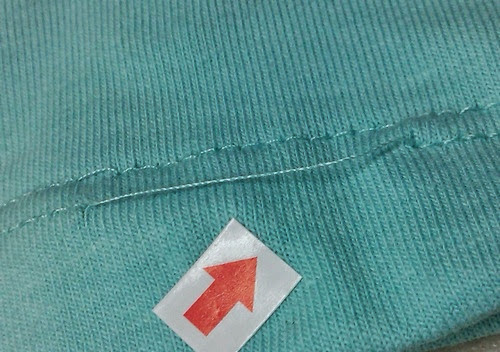
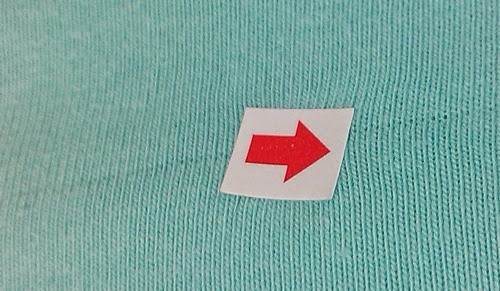
The above faults are given below with images:

1. Missing stitch
Missing Stitch
Missing Stitch
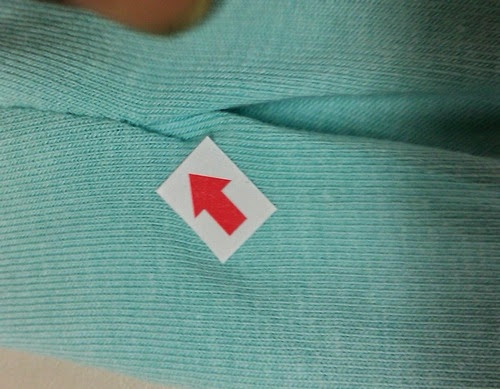
2. Skip stitch
Skip stitch
Skip stitch
3. Lycra missing
Lycra missing
Lycra missing
4. Bottom up down
Bottom up down
Bottom up down
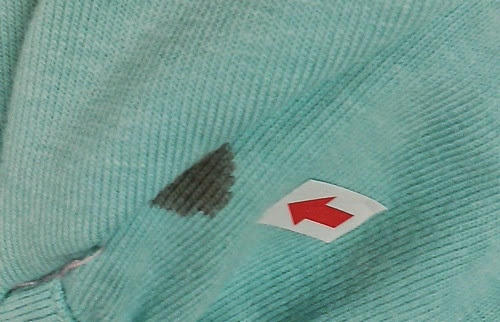
5. Oil spot
Oil spot
Oil spot
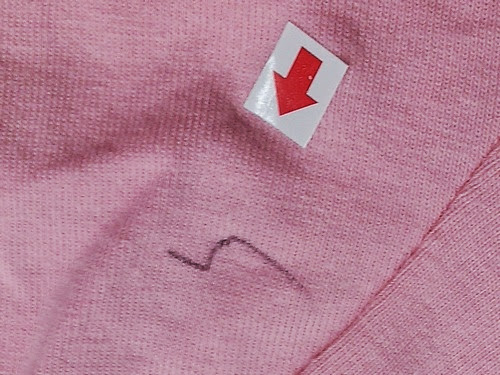
6. Pen spot
Pen spot
Pen spot
7. Over stitch
Over stitch
Over stitch
8. Hole
Hole
Hole
.

Garments Costing


Cost typically can be defined as’ the economic value placed upon the resources consumed to make a product. Costing of garment is a very important task for a garments export business. Costing of the garments considering the raw materials expenditure, salary and wages of officers and workers, distributions and advertisement expenses etc.garments export business

Cost Division:

Cost is divided into-
  1. Pre-cost- merchandiser
  2. Final Costing- Merchandiser+ import section
Garment for example :- $3.00 = cost
Garment costing: $3.00+ profit = costing
Pre Cost-
  • It is an estimate made before the garment is adopted in to the line
  • Fabric,trim and labour costs for each garment is calculated
  • The merchandiser usually keep a record of all materials costs on a work sheet
  • Then the costing department can roughly estimate the cost and price structure.
Final Costing-
  1. It is an exact figures for fabric,accessories and labour cost
  2. Using actual figures for fabric,accessories and labour cost
  3. Costing department uses-
    • Merchandiser work sheet
    • A proto type garment
    • Production pattern
    • A detailed cost analysis made for each garment the final cost is plotted on a ‘’cost sheet’’.

Price Fixation Process in Garments Export Business

FOB (Free on board):-
  • Exporter does not bear the cost of freight of ship or air
  • It is buyer who him self bear the freight
C&F (Cost $ Freight):-
  • Free on board+ freight= c& f
  • In this case ship or air freight is carried by the exporter while while quoting price.
  • This price a bit higher than FOB
CIF (Cost,insurance &Freight)
  • C & f + insurance =CIF
  • In this case in addition to the bearing of freight, the cost of insurance is also borne by the exporter.
CM (Cost of making)
  • Manufacturing or exporter will get only making charge of that garment
  • Fabric, trimming and other materials is supplied by the buyer
CMT(Cost of manufacturing and trimming)
  • Manufacture or exporter will get the making charge and at the same time will get the trimming cost
  • Fabric is supplied by the buyer.

Costing for Knitted T-shirt


Men’s Basic T-shirt-short sleeves- 100% Cotton 140 GSM Single jersey – 1 x 1 ribs at neck – solid dyed – light, medium and dark colors in equal ratio.
Sizes: S, M, L, XL, XXL Ratio: 1: 2: 2: 2: 1
Measurements in cm: (Finished garment)
Size: L
Chest – 60 cm
Length – 78 cm
Sleeve length – 24 cm
Neck rib width – 3 cm Hem – 3 cm
Patterns are generally made with the seam allowance and cutting allowance. Generally, 12 cm is added with the total of body length and sleeve length.
That is,
Fabric consumption/pc = [(Body length + Sleeve length + allowance) * (Chest + allowance) * 2 * GSM] / 10000 
=[(70 + 24 + 12) * (60 + 3) * 2 * 140] / 10000
= 187 grams
Body & Sleeves: 187 grams
Neck rib: 10 grams (approximately)
Gross weight: 197 grams or 0.197/kg
Fabric consumption/ dozen = 0.197 X 12 = 2.364 kg
Here, fabric price/kg= $6
Fabric price / dozen = 6 X 2.364 = $ 14.184
Fabric price/ dozen = $ 14.184
Per dozen CM cost = $ 5.5
Per dozen accessories cost = $5.0
Per dozen overhead cost = $1.8 (bank handling, carriage, forwarding)
Commission = $3
—————————————————————–
Total FOB price = $29.484 (including commission)
Here, total FOB price = $29.484
Per dozen sea freight = $ 1.34
———————————————————————
Total C&F price (Hamburg)/dozen = $ 30.824
Again, total C&F price / dozen = $ 30.824
Per dozen insurance cost = $ 1.3
Total CIF price / dozen = $ 32.124
Total CIF price/piece = (32.124÷12) = $ 2.677

Working Principle of Overflow Jet Dyeing Machine

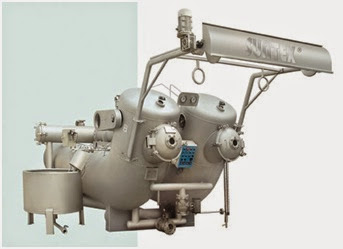
Overflow Jet Dyeing Machine

Overflow Jet  dyeing machine is used for pre-treatment and dyeing of rope fabrics, with both liquor and materials moving; the architecture and the design of the system and the liquor ratios are similar to the jet machine ones. The main difference is the fabric transport system, driven partly by a motorized reel, and partly by the sequential flow of the liquor. The jet system nozzle, based on a Venturi tube, is replaced by a vessel containing the liquor; the liquor enters the straight pipe section and then flows through the transport channel, together with the fabric rope.
Overflow Jet Dyeing Machine
This Machines are designed for use in delicate knitted and woven fabrics that are made up of natural as well as synthetic fibers. They are also extensively used in the production of carpets. The main difference between jet and overflows jet machines is that in jet machines the fabric gets transported by a bath that flows at high speed through the nozzle, while in Overflow Dyeing Machine it is the gravitational force of the liquor overflow that is responsible for fabric transportation.
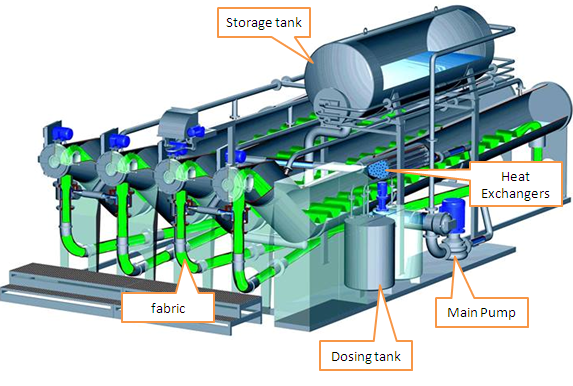
Parts of Overflow Jet Dyeing Machines

Working Principle of Jet Overflow Dyeing Machine

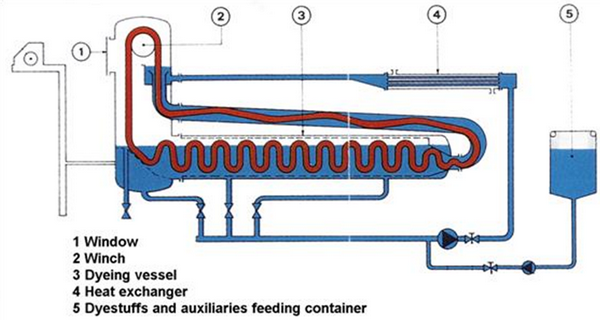
A typical Overflow Jet Dyeing Machine works like this. A winch that is not motor driven usually is located in the top side of the machine where the fabric is hanged. A longer length of textile is made to hang from the exit side of the winch as compared to the inlet side. By applying the force of gravitation the longer length of textile is pulled downward more strongly than the shorter one. Consequently the fabric is soaked in the bath without any sort of tension. The following diagram well illustrates the working process.
Schematic diagram of Overflow Jet Dyeing Machines

Technical Parameters of Overflow Jet Dyeing Machine:Advantages of Overflow Jet Dyeing Machine
  • No evaporation losses– As the dyeing vessel is closed, there is no evaporation losses stemming from the dye bath. Further, depending on the situation the temperature may be raised to more than 100 Degree C.
  • No build up of steam condensate in the dye bath– The latest technology implies that the dyebath gets heated by a heat transducer which is steam driven. This technology apart from being very efficient ensures that there is no build up of steam condensate in the dyebath.
  • Low liquor ratios– Dyeing is conducted at relatively low liquor ratios, e.g. 10:1 and may be lesser resulting in substantial savings in water and energy.
  • Excellent dye liquor contact– Excellent dye liquor contact with the fabric rope results in better and more improved level dyeings.
  • Computer control– The machines are operated by computer and hence, operator error is eliminated.

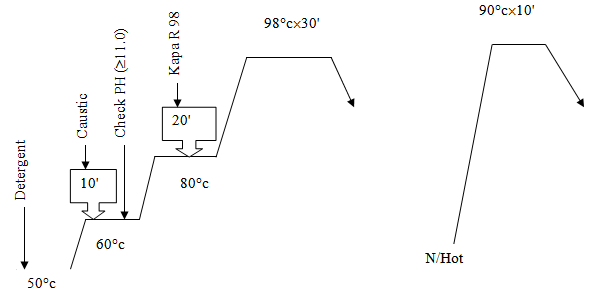
Stripping Procedure

Stripping:

Stripping is carried out to remove uneven of shade or to reduce darkness of shade. 

Full stripping for 100% cotton:Full stripping for 100% cotton

  1. Detergent: 1 g/l
  2. Caustic soda: 3 g/l
  3. Kapatex R 98: 5g/l

Process steps:

  • Take water at required level
  • Load the fabric
  • Raise the temp at 60 Degree C & circulate the fabric..
  • Add sequestering agent, anticreasing agent..
  • Raise the temp. at 70 Degree C add Castic soda..
  • Raise the temp. at 80 Degree C & add Hydrose..
  • Circulate the fabric & raise the temp at 100 Degree C & continue 60 min
  • Decrease the temp at 80 Degree C & rinse for 10 min & drain
  • Add acetic acid and raise the temp. . at 60 Degree C and run for 10 min..
  • Drain

Washing for colored fabrics:

  • The colored fabrics to be washed is loaded in the machine
  • Required amount of water is taken
  • PCLF (detergents) added & washing continued at 80 Degree C for 20 mins
  • Cold washing

Re-dyeing:

When shade is not matched then fabric is treated again in dyeing machine for shade matching is known as re-dyeing..
Generally, re-dyeing is done if the shade is deeper than the target shade.  It may occur when the fabrics absorb one or two colors more or less.
One re-dyeing process is described below..
  • Drain the let off solution
  • Hot wash at 70-80 Degree C
  • Acid wash at 60-70 Degree C(60 for light shade & 70 Degree C for deep shade)..
  • Soda ash washes at 90-100 Degree C for 60 mins to reduce the depth of shade..
  • Acid wash at 60 Degree C..
  • Addition to required dyestuffs..
  • Salt addition..
  • Soda ash addition..